STEP 1: COMPOSING A SCENE


Justin and I had a very specific idea in mind for what the painting should be like in order for it to fit the narrative of the story. One of the themes we wanted to depict was the innocence and free spirit of youth, and the sense of a world full of possibilities and mystery.
Justin came up with some initial conceptual thumbnails to start with while I did several studies of animals and figures. Once we decided on an arrangement and narrative that we both liked, I began the final drawing.
STEP 2: BLOCKING IN COLOR


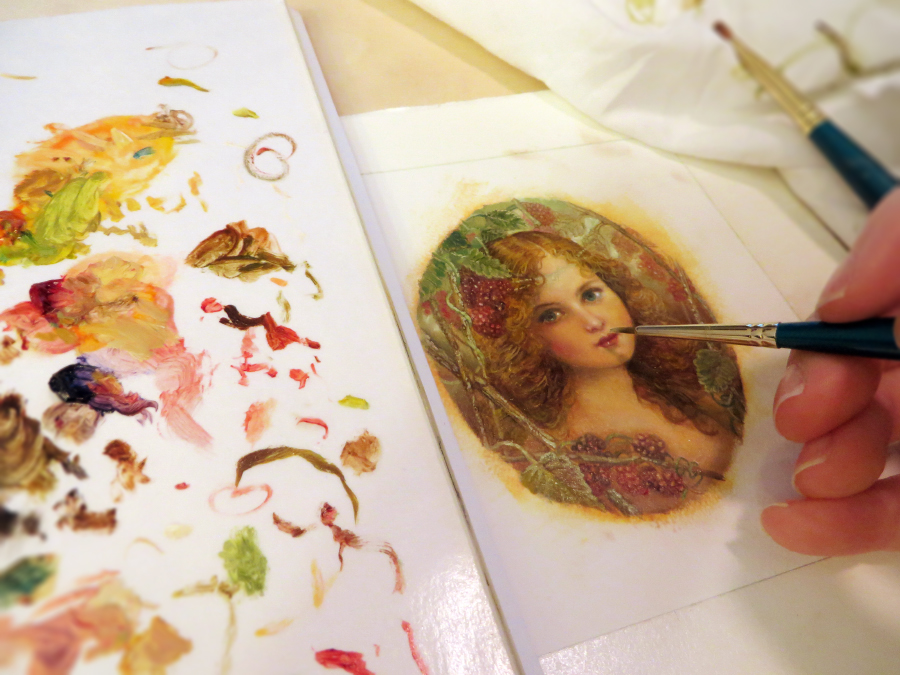
Determining a palette is very important for me before I start adding color washes. For this piece I knew I wanted to use a limited base palette of Green Umber, Raw Umber, Paynes Grey, Titanium White, and for the fox, Old Holland's Red Gold Lake. To thin the paint, I used Gamblin's Solvent-Free Fluid. (Remember to observe fat over lean! If you use too much oil, it will bead up on the surface.)
All of the base colors are applied in light layers. I like to keep the pencil lines visible to act as a guide as I build color. This step helps me determine the mood of the painting as well. Having a strong foundation will help me in subsequent steps, and makes the detailing process much easier for me. After I apply my base colors, I set the painting aside to dry. I need the painting to be dry because I like to drybrush in my shadows and highlights, and this works much better of a completely dry foundation.
STEP 3: PAINTING FUR
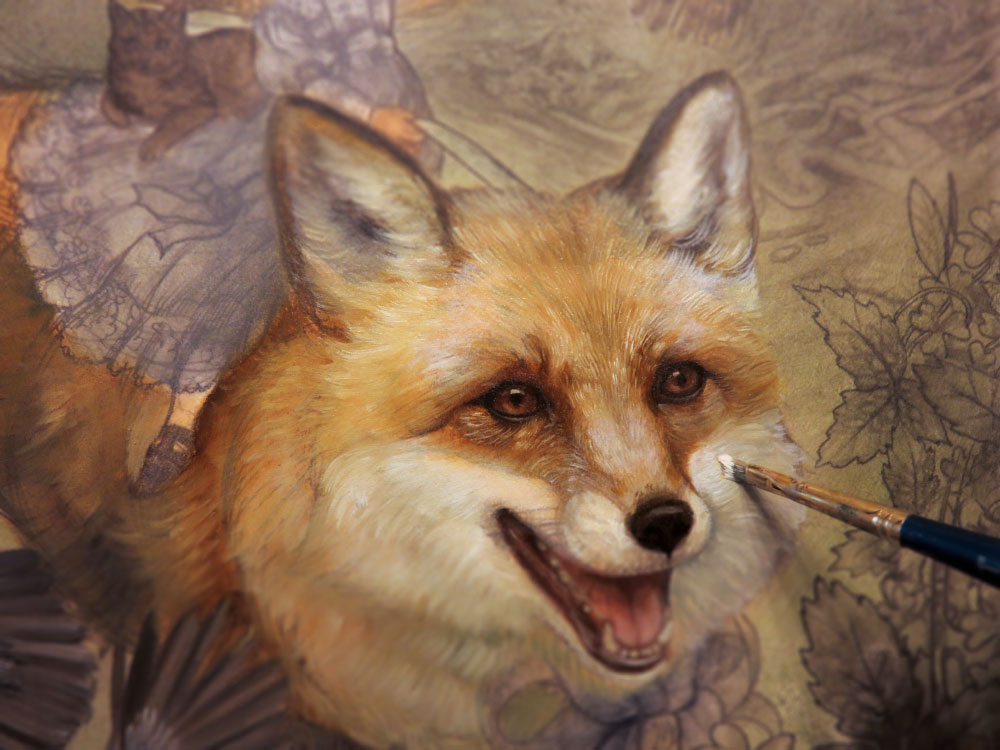
For this piece, I decided to start with the fox. Using Red Gold Lake mixed with Raw umber, I buff in the shadows of the fur. Mixing Paynes Grey with Raw Umber gives the darks I need for around the eyes and the nose. Titanium White mixed with small parts of Red Gold Lake are used for the highlights. I like to paint the individual hairs, and then smooth them using a wider soft brush. This way the fur is defined, but still appears soft. For the finer hairs, like the long ones around his ears, eyes, and whiskers, I like to use a sharp tipped brush (Pointed Round 3×0). For this step, I add a new color to my palette as well. Alizarin Crimson will give me all of the rosy hues I need for this piece.

STEP 4: WORKING IN THE FOLIAGE

Now I begin work on the foliage.
Starting with the dry base from step 2, I begin to block in the smaller details of the piece. In this case, it's the individual leaves, and the strawberries. By mixing Green Umber with Red Gold Lake a more vibrant leaf color is achieved. The strawberries are blocked in using Alizarin Crimson. To give the leaves more dimension, I highlight the top outer edge where the light would be hitting them using titanium white. As you can see in fig. 2, the colors are very stark. After this layer has dried, I soften it by applying a glaze of Green Umber mixed with Gamblin's Solvent Free Fluid (fig. 3). While the paint is still wet, I am going to add the same golden highlights to further define the leaves. After the sharp details are added with the fine tipped brush, I can go back soften them by dabbing them with a wider frayed brush. Lastly, I will add highlights to the strawberries using Titanium White mixed with Alizarin Crimson (fig. 4). These steps are repeated for the rest of the foliage in the piece.

STEP 4: ADDING SOME FEATHERS
Much like the fox, I buff in the shadows and highlights for the birds in the painting using the dry base from step 2 (fig. 1). The feathers are created by dabbing the brush onto the painting. The feathers will will rough and chunky initially (fig. 3), but by gently dabbing them with a frayed dry brush using the same manner as the fox's fur you can achieve a softer finish (fig. 4).

STEP 5: PAINTING ELIZABETH AND CHARLEMAGNE
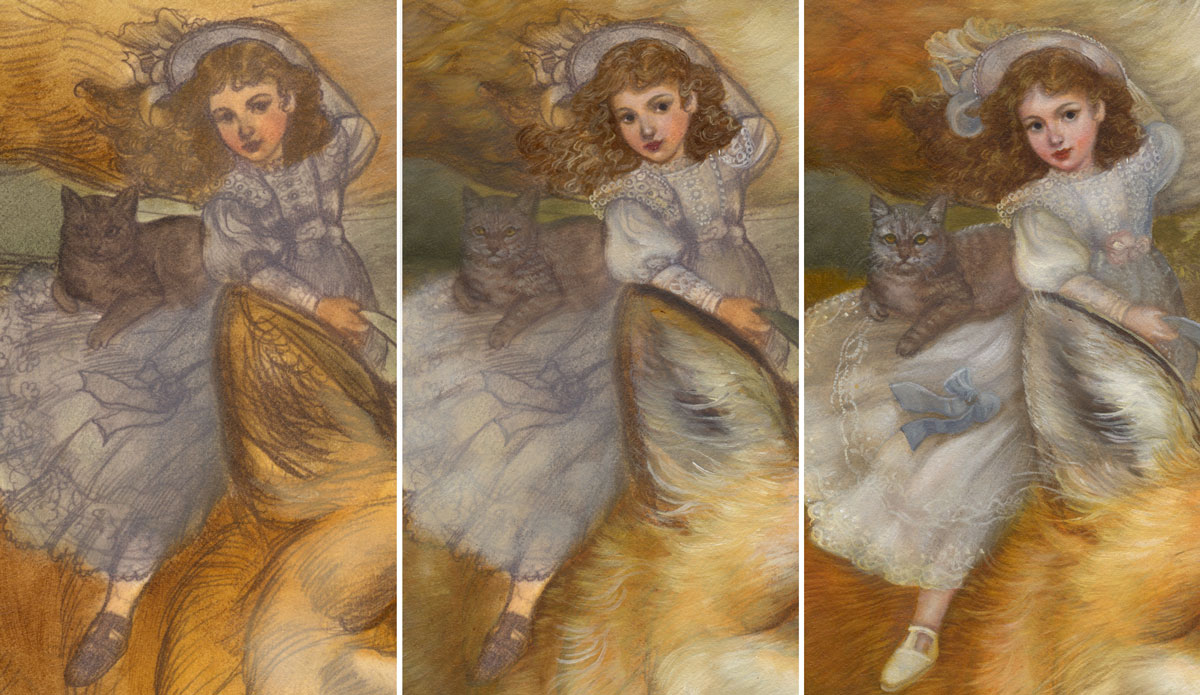
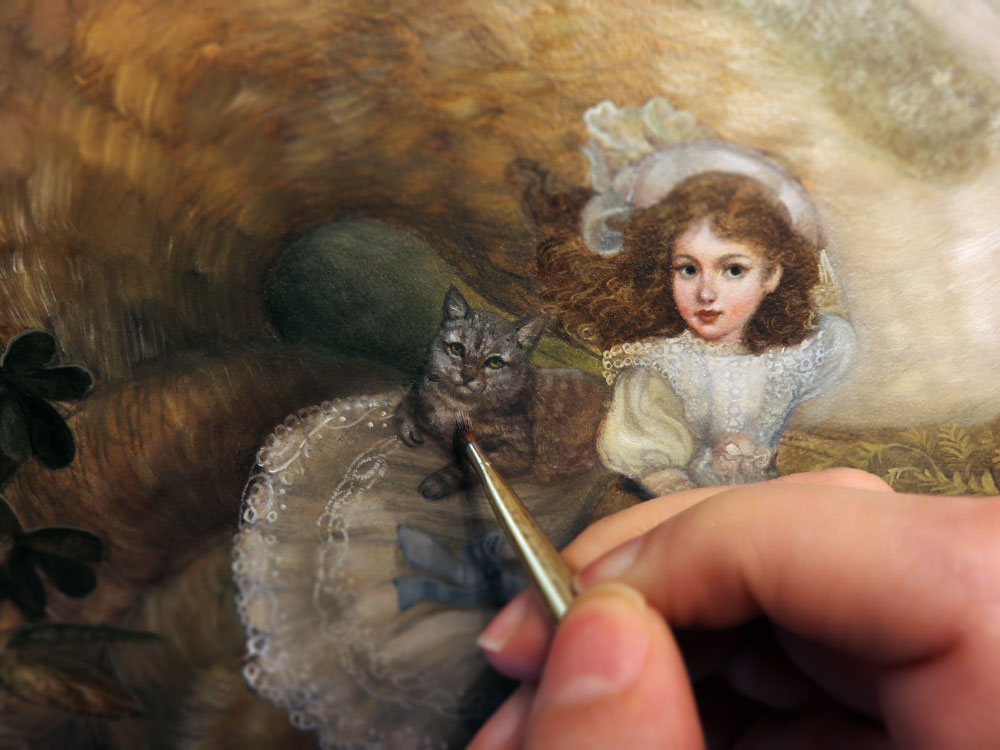
For the little girl's skin tone I mix Titanium White with Red Gold Lake and Raw Umber. Small amounts of Alizarin Crimson are added to the cheeks and lips. For the finer details, like the lace trim on her dress, Titanium white is thinned using Gamblin's Solvent-Free Fluid. Her hair is painted using Raw umber as a base. For warmer highlights, I mix Titanium White with Red Gold Lake to warm them.

STEP 6: FINISHING UP

"Renard and the Strawberries", 12x16, oil on board
Lastly, I add a unifying glaze with a very thin amount of medium and subtle warm tones. And now we are finished! From start to finish the whole process has taken about three and a half weeks of work.
This painting, along with 8 others will be appearing in our book, The Other Side of the Mirror, later this year at Gallery Nucleus. Please check back in over the next few months as we release more demos and preview work! You can see some working steps of the other images in the series as we create them here.