Hey guys! Justin and I are working on a series of mini paintings of Dryads and Satyrs. My first painting in the series is Morea, the dryad of the mulberry tree. I thought I would document the process as I went along.
Step 1: The drawing

After deciding on a thumbnail I like, I transfer it to Strathmore series 500 paper by shading the backside of the thumbnail paper and tracing over it with a sharp pencil. The lines will be transferred to your new paper using this "carbon copy" technique.

I like to use the Prismacolor col-erase brown pencils to create the final drawing. In this case, the drawing is going to act as the underpainting for the image. Normally I would use paint for this stage but because this image is only 2.5x3 inches, pencil seems more appropriate. I pay attention to the overall lighting of the piece during this step to make the painting process run more smoothly.
When the drawing is complete, I seal it using golden matte medium. This protects the paper from the oil that is going to be applied in subsequent steps, ensuring that the painting is archival. Be sure the matte medium is 100% dry before you start adding oil.
STEP 2: Blocking in color

Once a palette is determined, rough colors are applied in light layers. I like to keep the pencil lines visible to act as a guide as I build color. After this step, I set the painting aside to dry.
STEP 3: Glazing

Using walnut oil alkyd, I mix hansa yellow and alizarin crimson to make a golden orangey hue. I apply this to the surface of the painting. Remember to observe fat over lean. If you use too much oil, it will bead up on the surface.
This step unifies the lighting in your piece. I am going to repeat this step many times before the piece is completed.

STEP 4: Detailing
While the surface of the painting is still wet from the previous glaze, I like to add a detail layer. Using a fine tipped brush and mostly titanium white paint, I can add in the highlights.
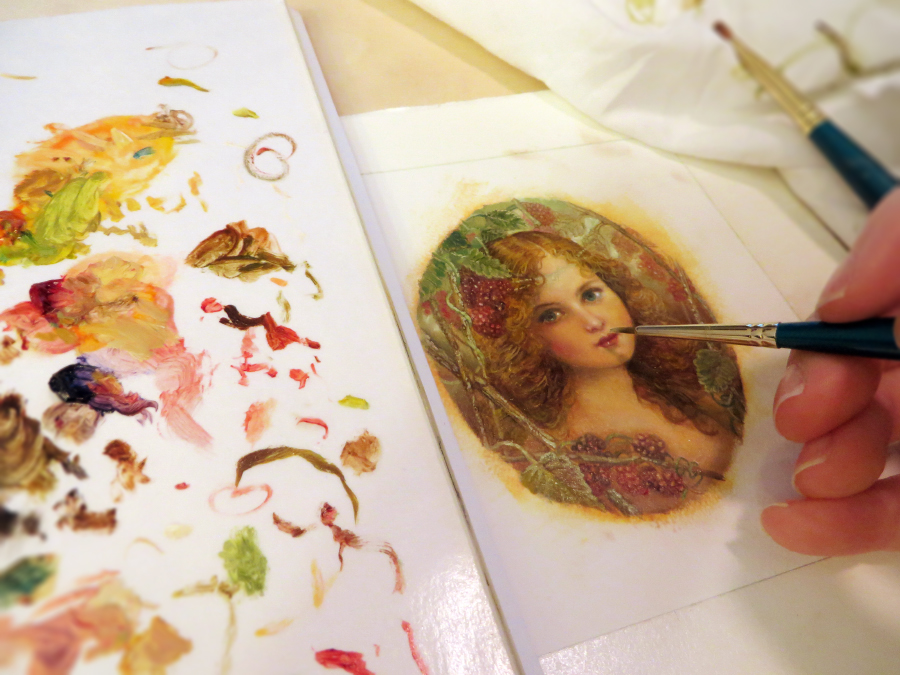


When detailing my image, I like to use one sharp tipped brush (Pointed Round 3×0) and one older brush that is a little frayed (Angled shader 1/8") After the sharp details are added with the fine tipped brush, I can go back soften them by dabbing them with the frayed brush. In the example above, you can see what the strands of hair look like before they are softened.
STEP 4: REPEAT, REPEAT, REPEAT!
So typically for a piece like this, I will do steps three, four, maybe even a dozen times. It is crucial to make sure the painting is dry each time you cycle through these two steps. When you glaze the piece, your highlights will become diminished, but don't panic! Just paint them back in during the detail stage. This allows the painting to gradually build dimension and vibrant color.

STEP 5: Presentation

For this image, I have chosen a vintage early 1900s solid brass filagree Italian frame. I have been collecting these tiny frames, and have a little stockpile built up that we will be using for all of the paintings in this series.